Learn how to paint a turtle on rocks with this simple video tutorial. Grab your paint pens or your favorite paint brush and let’s dig into this fun stone painting idea.
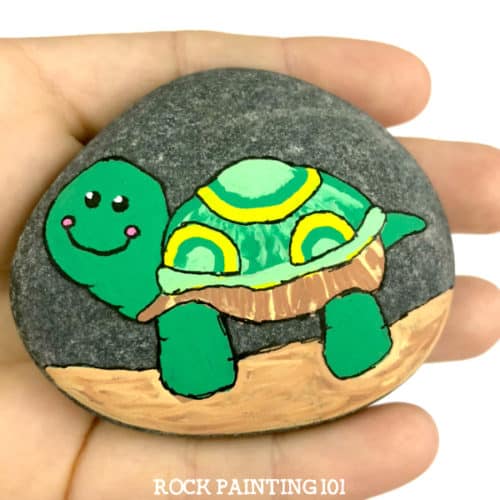
Turtle Rock Painting
This adorable turtle rock painting so much fun to create. He would make a great rock to hide or to give as a gift.
This animal rock uses a block painting method, so it’s perfect for beginners!
This page contains affiliate links which means if you make a purchase using the link, I could receive a commission. Check out all the details here.
Step by step instructions for this turtle painted rock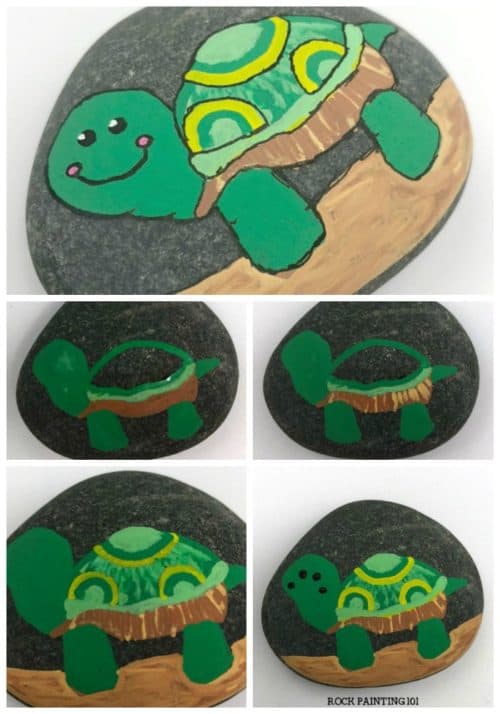
You can grab the Posca pens that I used on this painted rock here.
Like most of our animal rocks, we start out by adding the basic shapes to our turtle. This ensures it will fit on the rock well and gives our bottom coat some time to dry.
Start with adding your head, legs, tail, and basic shell shape.
You will use brown for the bottom portion of your shell and a little rim of light green for where the top meets the bottom. 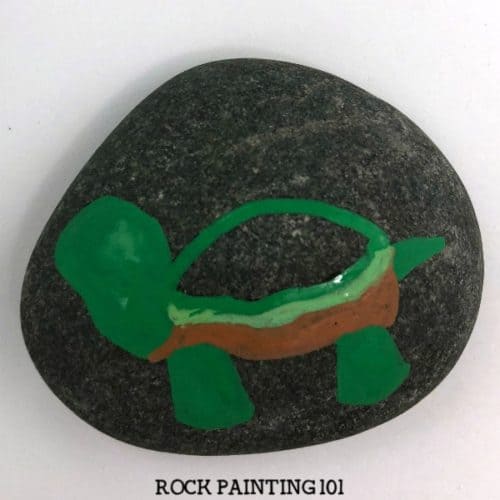
Using vertical strokes alternate between dark brown and a lighter tan to give the underbelly a ridged look.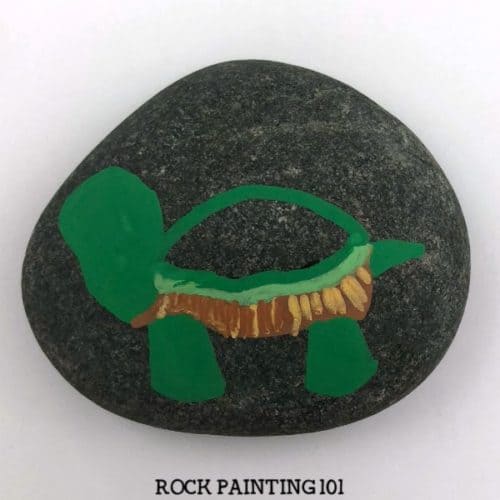
Next, you can start decorating the shell. We did yellow, dark green, and light green half circles.
Give your turtle something to stand on. Blend a few colors back and forth to create sand or water. 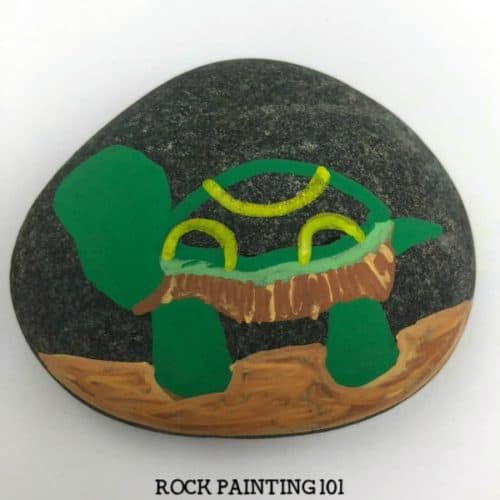
Fill in the rest of the shell using the same technique as the underbelly, just follow the curve of the shell instead of vertical strokes.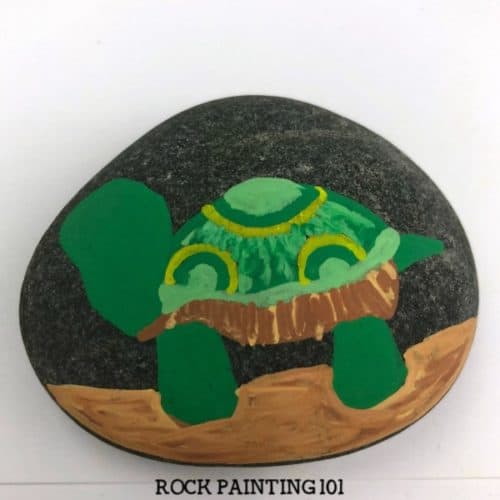
Time to make our turtle happy! Add thick black dots for the eyes and for the outside of his smile.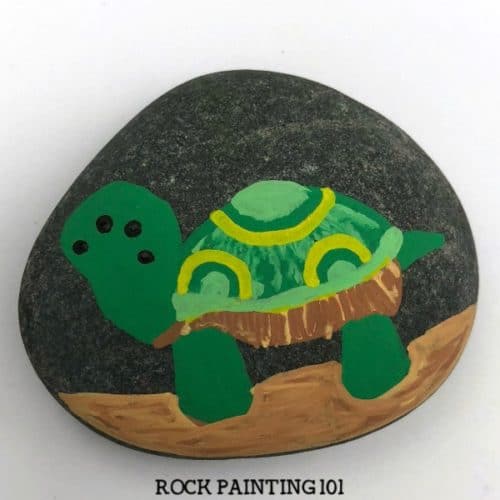
101 Tip!: Watch for divots in your rocks and place your face around them!
While your dots dry outline the rest of your turtle. Add in pink dots for cheeks and white highlights in the eyes and your finished!
How to paint a turtle on rocks!
If you create one of these rocks, please share it with us!! Leave a picture in the comments of our Facebook Live!
Pin this animal rock to your favorite Pinterest board!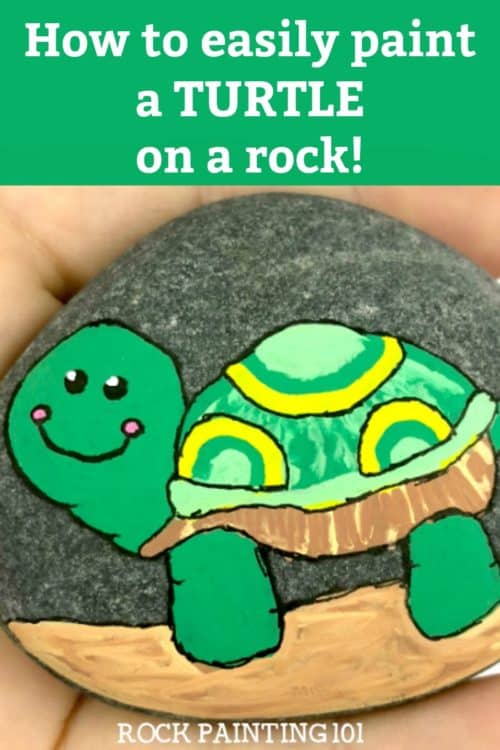
If you enjoyed this fun rock painting idea, you’ll love these!